Looking to automate tasks on your Ubuntu server? Look no further! In this article, we will walk you through the simple steps to set up a cron job on your Ubuntu system. A cron job allows you to schedule and automate repetitive tasks, such as running scripts or commands at specific intervals. Whether you want to schedule backups, update software, or perform regular maintenance, setting up a cron job in Ubuntu is an efficient solution. So, let’s dive in and master the art of setting up cron jobs in Ubuntu!
Setting Up a Cron Job in Ubuntu
Cron is a time-based job scheduler in Unix-like operating systems, which automatically executes tasks at specific intervals. It is an essential tool for automating repetitive tasks, such as running scripts, downloading files, or performing system maintenance. In this article, we will explore how to set up a cron job in Ubuntu, step by step.
Understanding the Cron Job Structure
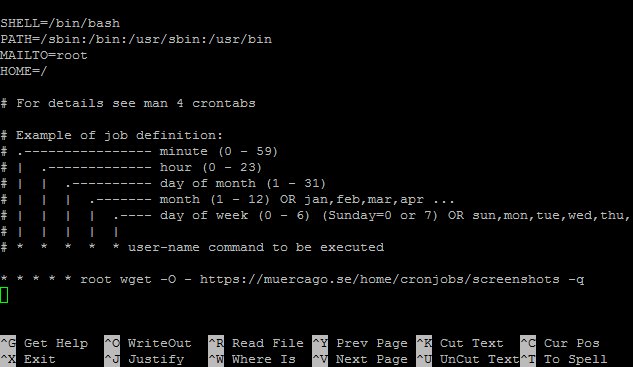
Before diving into the setup process, let’s take a moment to understand the structure of a cron job. Each cron job consists of a cron expression and a command to be executed. The cron expression defines the schedule for running the command and is composed of five time fields: minute, hour, day of the month, month, and day of the week.
Here is an example of a cron expression:
* * * * * command-to-be-executed
The asterisk (*) represents a wildcard, meaning that the command will be executed for every possible value of that time field. For instance, the above expression will execute the command every minute.
Logging in to your Ubuntu Server
To begin setting up a cron job, you need to log in to your Ubuntu server. Here are the steps to do it:
- Open a terminal window on your local machine.
- Use the following command to establish an SSH connection with your server:
ssh username@server_ip_addressReplace ‘username’ with your server’s username and ‘server_ip_address’ with the actual IP address of your server.
- Enter the password when prompted.
- You are now logged in to your Ubuntu server, ready to set up a cron job.
Creating a Cron Job
Once logged in to your Ubuntu server, follow these steps to create a cron job:
- Open a terminal window.
- Enter the following command to open the cron table for editing:
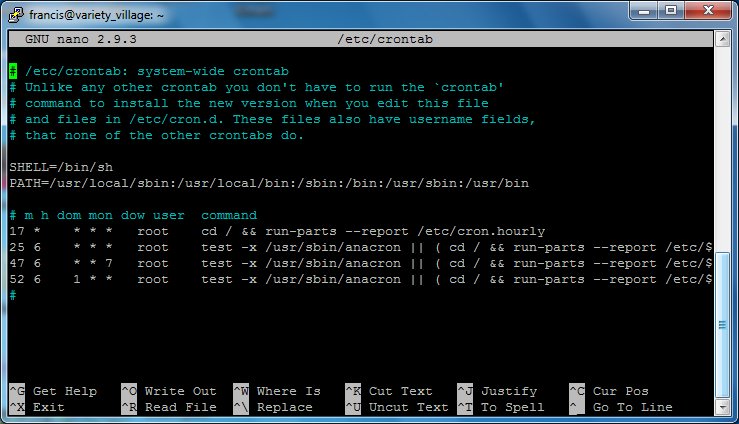
crontab -eThis will open the cron table in your default text editor.
- Choose your preferred text editor if prompted.
- Add a new line to the file using the following format:
* * * * * commandReplace ‘command’ with the actual command you want to execute. You can specify the full path to the command or use a relative path.
- Specify the scheduling details in the time fields of the cron expression. Here are some examples:
- @reboot: The command will run once when the system starts up.
- @hourly: The command will run every hour.
- @daily: The command will run once every day.
- @weekly: The command will run once every week.
- @monthly: The command will run once every month.
You can also specify custom schedules using the time fields. For example, to run a command at 3:30 PM every Tuesday, use:
30 15 * * 2 commandNote that the time fields use a 24-hour clock format.
- Save the file and exit the text editor.
Verifying the Cron Job
After creating a cron job, it’s important to verify that it is set up correctly. Follow these steps to check:
- Open a terminal window.
- Enter the following command to view your cron table:
crontab -lThis will display the contents of your cron table.
- Verify that the cron job entry you created is listed.
Managing Cron Jobs
Once you have set up cron jobs, you may need to manage them over time. Here are some useful commands for managing cron jobs in Ubuntu:
| Command | Description |
|---|---|
| crontab -e | Edit the cron table |
| crontab -l | List the cron table |
| crontab -r | Remove the cron table |
Troubleshooting Cron Jobs
If your cron job doesn’t seem to be working as expected, here are a few troubleshooting steps you can follow:
- Check the cron log for any error messages. Use the following command to view the cron log:
grep CRON /var/log/syslogThis will display any cron-related messages in the system log.
- Double-check the command and cron expression in your cron job. Make sure there are no syntax errors or typos.
- Ensure that the command you are trying to run is executable and has the necessary permissions.
- If your cron job depends on specific environment variables, consider explicitly setting them in the cron job. You can use the ‘env’ command to list the current environment variables.
- If you’ve made any changes to the cron table, make sure to save the file and exit the text editor.
Setting up a cron job in Ubuntu allows you to automate repetitive tasks and streamline your system’s maintenance. By following the steps outlined in this article, you can easily create and manage cron jobs on your Ubuntu server. Remember to verify and troubleshoot your cron jobs if needed, ensuring they are running as intended. With cron, you can save time and effort by letting your system handle routine tasks automatically.
How to schedule a CRON job to run a script on Ubuntu 20.4.1
Frequently Asked Questions
How do I set up a cron job in Ubuntu?
To set up a cron job in Ubuntu, you can follow these steps:
- Open the terminal.
- Use the crontab command to open the cron table for editing:
- In the editor, add a new line that specifies the timing and command for your cron job. For example, to schedule a job to run every day at 8:00 AM, you can use:
- Save the file and exit the editor. The cron job will be automatically scheduled.
crontab -e0 8 * * * /path/to/commandHow can I check if my cron job is running successfully in Ubuntu?
To check if your cron job is running successfully in Ubuntu, you can do the following:
- Open the terminal.
- Use the following command to view the cron job execution logs:
- This command will display any logs related to cron job executions. You can look for any error messages or check if the job has been executed as expected.
grep CRON /var/log/syslogCan I schedule a cron job to run at a specific interval in Ubuntu?
Yes, you can schedule a cron job to run at a specific interval in Ubuntu. Instead of using the usual cron syntax (e.g., 0 8 * * *), you can specify the exact interval using a special syntax.
For example, to run a job every 30 minutes, you can use:
*/30 * * * * /path/to/commandThis will execute the specified command every 30 minutes.
How can I list all the existing cron jobs in Ubuntu?
To list all the existing cron jobs in Ubuntu, you can use the following command in the terminal:
crontab -lThis command will display the contents of the current user’s crontab file, which contains all the scheduled cron jobs.
Can I edit or remove an existing cron job in Ubuntu?
Yes, you can edit or remove an existing cron job in Ubuntu by following these steps:
- Open the terminal.
- Use the crontab command with the -e option to open the cron table for editing:
- In the editor, locate the line corresponding to the cron job you want to edit or remove.
- Edit the line to make the desired changes or delete the line to remove the cron job completely.
- Save the file and exit the editor to apply the changes.
crontab -eFinal Thoughts
In conclusion, setting up a cron job in Ubuntu is a straightforward process that can greatly enhance the automation and efficiency of your tasks. By utilizing the cron service, you can schedule scripts or commands to run at specific times or intervals. This ensures that repetitive or time-sensitive tasks are executed reliably. The flexibility and simplicity of cron make it an essential tool for any Ubuntu user. So, if you’re looking to streamline your workflow and automate routine tasks, setting up a cron job in Ubuntu is a must.


